Tuesday 24 January 2012

Painting Cabinets: Priming

Decided to go with Zinsser 1-2-3 Primer for the cabinets.  The lack of paint/stain on the cabinets meant that we could probably get away without using an oil-based primer.  The 1-2-3 sounded like a fine fit for the project.

Backs and sides done and dry.  Working on the fronts.

Finished priming, good coverage means 1 coat will do.


All the doors finished and drying for 24 hours.


Cabinets done in primer.  Had to use some BIN spray in a few spots.

Painting Cabinets: Preparation

Got all the doors off the cabinets and set up an "assembly line" in the basement to work on.

Sunday night.
Sunday night.
Next day, we got to filling the holes from the old hardware with wood-filler and sanding it smooth.  We are replacing the handles with knobs so one hole needed to be filled and smooth.  Did this on the inside and outside and also filled any knicks or other imperfections in the door.  Got them sanded smooth before finishing for the night.

Monday night.
Final part of the preparation stage was washing down the cabinets with TSP and water (about 1:15) and then again with water to remove any film left by TSP.


Wednesday night.
 
All ready for primer!

Someone Stole Our Doors!

Ok, not stolen but removed for some... rejuvenating.

Kitchen Gets an Island and New Pantry

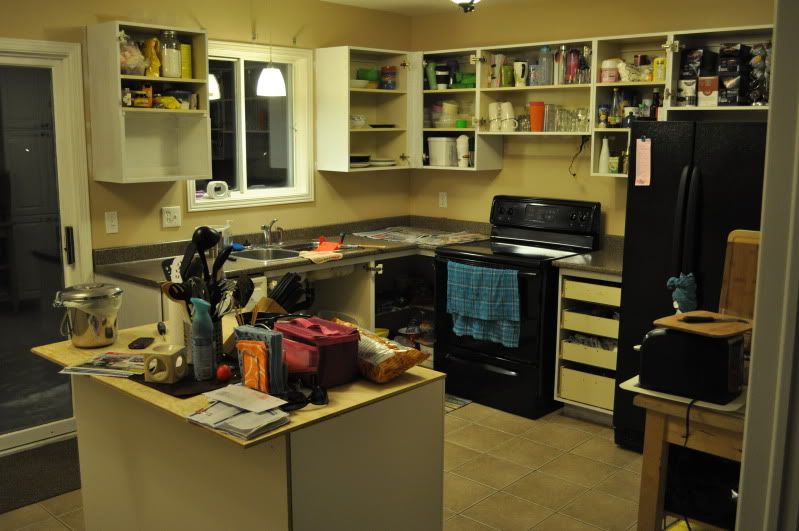
We quickly realized the the kitchen was not terribly functional, especially due to the lack of counter space.  First thought: buy/build island.  After looking for something used for a couple weeks, made a trip to Home Depot and picked up two white cabinets from a truck load sale they were having.  Picked up a 30" base cabinet and a set of drawers.  This gives us an almost 4' island.  Temporarily we are using a sheet of good-one-side 1/2" plywood leftover from shelving project.  Already the island is used everyday, all the time, and don't know how we could do without it now.

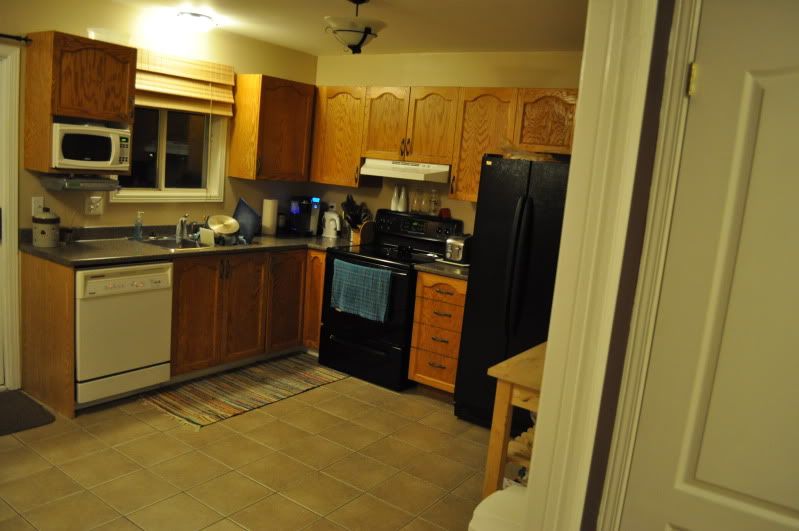
Empty... not much counter space.
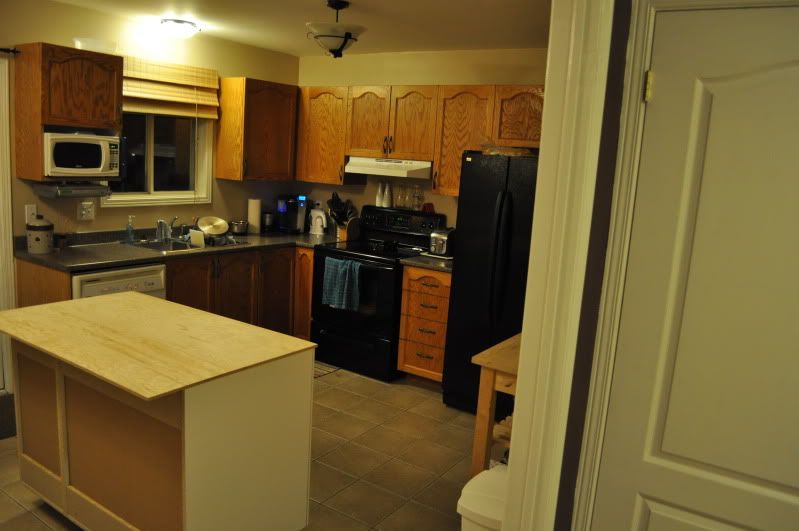
Island added in.

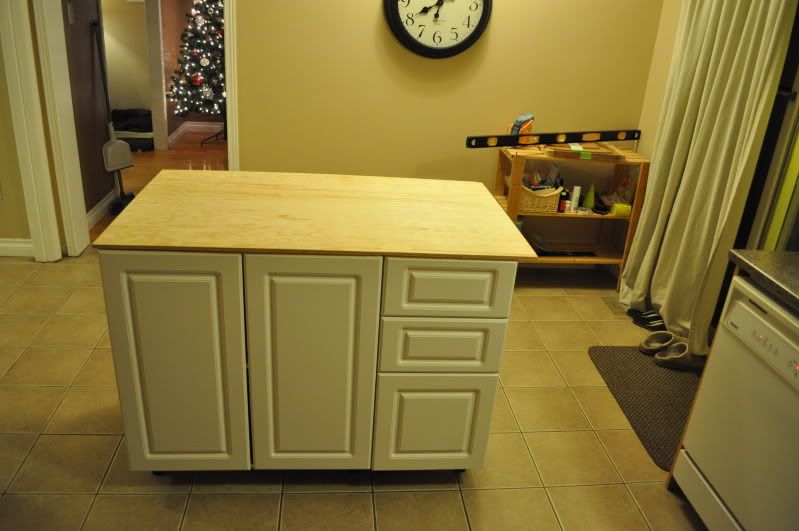
Not hardware or counter top yet.

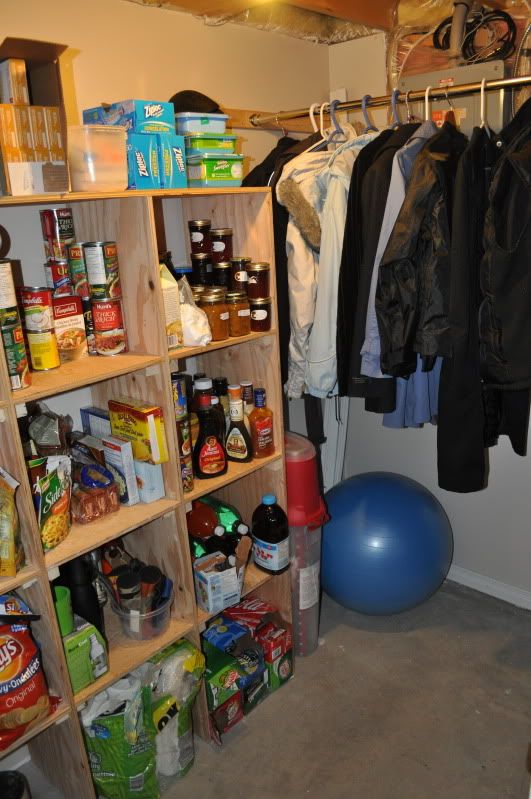
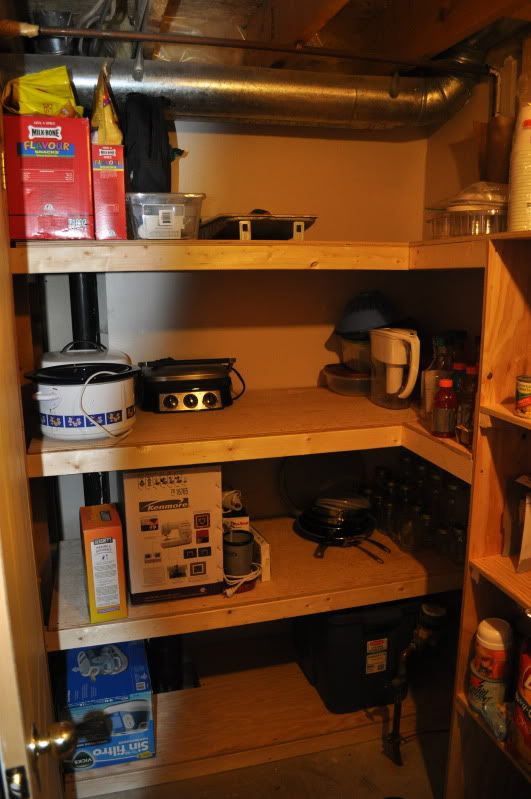
Around the same time, Erica's mom came down to visit.  As part of ah house-warming gift, she bought us 3 upper cabinets (same truck load sale as the island cabinets we used) to replace the pantry we currently had.  The pantry we had was a bit too deep and too far place left that the doors hit the fridge when open and we couldn't barely pull the shelves out from the fridge due to fridge door hitting pantry.

We screwed the new upper cabinets together and to the wall to create a new pantry which isn't as deep as the old one and moved to the right about 6".  This allows us to get the drawers out of the fridge easily and both doors can easily open.


Picture from house sale ad.
Note painter's tape handles.

More pictures to come in the near future.

Entrance Coat Rack

After replacing the drywall and priming and painting the entire foyer, we made a plan about what to do in the nook.

Before new drywall and paint.
Eventually we will be buying/building a bench and we decided to build a coat rack.  Having unsuccessfully used drywall anchors for the coat racks already (Erica ripped one out one day), it was decided we would screw board to wall, fill holes, prime and paint, and add hooks to the wood.  These things aren't going anywhere.

Board mounted, wood-filled, and 1 coat of primer.

After a couple coats of paint.
Finally hooks and coats up.

Izzy even got a hook for her leash:


New Master Closet Organizer

Don't have any before pictures but the closet used to be built with 16" deep particle board with 24" wide shelves on the left and a single closet bar on the right.  We ripped it all out taking with it a bunch of paint and drywall.  Repaired the drywall with a few coats of mud, sanded, primed, and painted.

(Blue lines represent the layout of the old closet with closet rod on the right hand side)

Old master closet organizer (blue lines)


We used 12" (or was it 14") melamine shelving boards to make the new closet organizer.  We used 1x3s screwed into the studs all around the closet to hold up the shelves.  The holes were countersunk to hide the screws and eventually we will fill the holes with wood filler and prime/paint the 1x3s.  Used some white closet rods and flush mount rod holders for the closet rods.  Everything fits good.  We also picked up some remote operated battery powered LED lights for the closet.  There are 4 pucks and although not that bright, work good for a bit of extra light in the closet.

The closet is much more functional as previously we had about 4 feet of closet rod and that was it.  Now we have almost 3 times that much.  The top shelf is quite high but still accessible and good for storing sweaters and such.  The closet didn't take very long once we got started but took a LOT of planning to try and figure out the best way to do it and make it look good.

New master closet.

Storage/Electrical Room Shelving

Unfortunately do not have before pictures but here are a few of the shelves that we built.  Built the food "boxes" first and the floating shelves after.  In retrospect, floating shelves all around would have been the way to go.  Oh well.  Also added the coat bar in front of the electrical panel and a box to cover the panel is in progress.  Room is about 5x12.

Food cubes work good but would have been much easier to build floating shelves.

Room is a lot fuller now.

Floating shelves, again, a lot fuller now.  Water meter was left accessible on bottom right.